

New to Crypto? Set Up a Zenon Network Node Like a Pro
Join the Revolution: A Step-by-Step Guide to Becoming a ZNN Node Operator

What You’ll Learn
Here’s a quick and engaging summary of what you’ll discover:
-
Alien Encounters: Hear about my unexpected meetup with Eat-T.
-
How to setup a Zenon Network Public Node: I’ll guide you through setting up your own node, step by step.
-
Earn as You Learn: Discover how running your own znnd node can be both educational and financially rewarding.
Imagine if an alien landed in your backyard and, instead of asking to see your leader, asked: “How to set up a Zenon Network public node?
That’s exactly what happened to me last week. I was playing with my newly acquired Bitcoin ordinals pixelated Pepe frogs when a spaceship, no bigger than a Cybertruck, landed right on the lawn. Out stepped Eat-T, a friendly (and rather chubby) alien, curious about our technology and particularly interested in a decentralized network named the Network of Momentum.
I took Eat-T to my computer, and we spent the afternoon setting up a Zenon Network public node together. It was like playing “Watch Dogs” with all the terminal prompts, but it was real life, with real-life consequences! Even though Eat-T was completely new to crypto, he was so impressed with what we had done, he said he’d recommend Zenon (or was it McDonald’s?) to all his alien friends.
Let me show you how we did it, step by step, just like I showed my new alien friend.
But before we begin, let’s delve into why supporting the network by hosting a public node is not just important, but also potentially rewarding. By participating in the network, you’re contributing to its strength and resilience, ensuring that transactions are processed efficiently and securely without relying on third parties. Additionally, by taking advantage of the incentivized node program, there’s a unique opportunity for you. Every time a bridged transaction without an active referral uses your public node, you earn a commission from the transferred amount. This not only provides a tangible benefit for your participation but also deepens your engagement with the network’s economy. Plus, it’s possible that in the future, running your own node will be directly incentivized at the protocol level.
My favorite part is that you can add a touch of personal flair to your node. Imagine it operating under your own cool domain, like:
wss://node.atsocy.com:35998 (yes, this is a live Zenon public node 🎉)This not only personalizes your node but also enhances its visibility and reputation within the network. Hosting a public node, therefore, becomes a blend of supporting our network, earning rewards, and showcasing and building trust in your unique digital identity.
Step 1: Preparing the Environment
First things first, you need a solid foundation for your node. This involves acquiring a Virtual Private Server (VPS) and ensuring your system is up to date.
1.1 Acquiring a Virtual Private Server (VPS)
A VPS, or Virtual Private Server, acts like your own personal mini-computer on the cloud and is crucial for running a stable public node. Think of it as renting a small part of a powerful computer that’s always on and connected to the internet. For a robust Zenon Network public node, you need a VPS with at least 4vCPUs and 32 GB of RAM. This specification, as recommended by Vilkris , one of ZNN’s main contributors: “To run a public node smoothly you need at least 32GB of RAM and more than 4 cores on a dedicated server.” ensures your node operates efficiently. We recommend choosing from reliable VPS providers like DigitalOcean, AWS, Linode, or OVHcloud. These providers are known for their great service and make it super easy to get started with hosting your public node.
Alternatively, you can follow jer0n’s DIY guide to configure a Raspberry Pi device from the comfort of your home.
1.2 Updating and Upgrading Ubuntu
Before we get to the fun part, make sure your server is up-to-date. Connect to your VPS by following the instructions delivered by your provider, and run these commands:
sudo apt update
sudo apt upgrade -y
This ensures you’re working with the latest and safest software.
Step 2: Configuring the User and SSH
Now, let’s set up your user account and secure your connection.
2.1 Creating a New User
Instead of using the default ‘root’ user, let’s make a new one named ‘node’. This is a smart move for keeping things secure. Run these commands to create your user:
adduser nodeEnter a strong passphrase and leave all other fields blank.
Add the new user to the sudo group.
usermod -aG sudo nodeVerify that the user has been added correctly and exit the root session.
cat /etc/passwd | grep node
exit
Reconnect to the VPS by using the node username.
ssh node@ip2.2 Changing SSH Port
To keep your server safe, change the default SSH port. Remember, you’ll also need to update your firewall to allow connections through this new port. We have used Vim to edit files in the terminal, but if you are not familiar with Vim, we recommend reading this nano guide instead.
Edit the /etc/ssh/sshd_config file
sudo vim /etc/ssh/sshd_configRemove the comment (#) and change the port to 65432. Your uncommented line should look like this:
Port 65432Restart the SSH service to apply the changes
sudo systemctl restart sshdFinally, allow the connections through the new SSH port
sudo ufw allow 65432/tcpExit the session and reconnect by adding the port flag.
exit
ssh node@ip -p 65432
For a safer setup, it’s better to use SSH Keys instead of a username and password. I really suggest checking out SultanofStaking’s VPS Set Up Tips. It has a detailed guide on how to do this and other important tips.
Step 3: Setting Up the Zenon Public Node
Now that your user account is set up and your SSH connection is secure, let’s get your Zenon Public Node up and running.
3.1 Downloading Zenon Controller
Next, download the ZNN Controller, which is the software needed to run your Zenon Public Node. This software is key to managing your node’s operations.
Use wget to download the ZNN Controller and then unzip it.
wget https://github.com/zenon-network/znn_controller_dart/releases/download/v0.0.4-alpha/znn_controller-linux-x86_64.zip
unzip znn_controller-linux-x86_64.zip
Run the Zenon Controller executable and select Option 1) Deploy. This will download all the extra requirements and create the znnd service.
sudo ./znn-controller3.2 Whitelisting znnd Ports
Configure your firewall to allow the necessary ports for znnd, which is essential for network communication.
Update UFW to allow Necessary TCP and UDP Ports.
sudo ufw allow 35995:35998/tcp
sudo ufw allow 35995:35998/udp
Optionally, you can turn off UFW logging.
sudo ufw logging off3.3 Update config.json for znnd
Configure the config.json file for optimal network performance, including adjustments for HTTP and WebSocket ports and specifying a custom domain.
Access the Config File
Log in as root and open the config.json file to make necessary changes.
sudo su -
sudo vim .znn/config.json
Update RPC Configuration
Change the default HTTPPort and WSPort from 35997 and 35998 to 36097 and 36098, respectively. This is done to avoid conflicts with the NGINX configuration that will be set up later. NGINX will listen on ports 35997 and 35998, so znnd needs to use different ports. Additionally, add your custom domain name to HTTPVirtualHosts. This step is crucial as it tells the znnd service to accept requests for your specific domain, ensuring proper routing and response to requests made to your domain.
"RPC": {
    "EnableHTTP": true,
    "EnableWS": true,
    "HTTPHost": "0.0.0.0",
    "HTTPPort": 36097,
    "WSHost": "0.0.0.0",
    "WSPort": 36098,
    "HTTPVirtualHosts": ["node.yourdomain.com"],
    "HTTPCors": [
            "*"
        ],
    "WSOrigins": [
            "*"
        ]
    }
}
Incorporate the “Net” Key
Modify the “Net” key settings as per recommendations from one of Zenon’s main contributors, aliencoder. These settings help in improving the performance of your node by optimizing the number of peers and connections.
"Net": {
    "ListenHost": "0.0.0.0",
    "ListenPort": 35995,
    "MinPeers": 8,
    "MinConnectedPeers": 8,
    "MaxPeers": 16,
    "MaxPendingPeers": 8
}
The final file should look like this:
{
    "Producer": {
        "Index": 0,
        "KeyFilePath": "producer",
        "Password": "REDACTED",
        "Address": "REDACTED"
    },
    "RPC": {
        "EnableHTTP": true,
        "EnableWS": true,
        "HTTPHost": "0.0.0.0",
        "HTTPPort": 36097,
        "WSHost": "0.0.0.0",
        "WSPort": 36098,
        "Endpoints": null,
        "HTTPVirtualHosts": ["node.yourdomain.com"],
        "HTTPCors": [
            "*"
        ],
        "WSOrigins": [
            "*"
        ]
    },
    "Net": {
        "ListenHost": "0.0.0.0",
        "ListenPort": 35995,
        "MinPeers": 8,
        "MinConnectedPeers": 8,
        "MaxPeers": 16,
        "MaxPendingPeers": 8
        }
}
Step 4: DNS Configuration & SSL Certificate Installation
In this step, we’ll secure your node with an SSL certificate, essential for safe, encrypted communications. We’ll also configure your domain’s DNS to create an A Record.
4.1 DNS Configuration
Before installing the SSL certificate, set up an A Record for your domain.
Configure the A Record:
Go to your domain’s DNS settings and create an A Record. Set the “host” as node and the “value” as the IP address of your VPS. This will link your domain (e.g., node.yourdomain.com) to your server.
4.2 Installing Certbot
Certbot simplifies the management of SSL certificates. Let’s install and verify it.
Install Certbot:
Use the following commands to install Certbot.
sudo apt install software-properties-common
sudo add-apt-repository universe
sudo add-apt-repository ppa:certbot/certbot
sudo apt update
sudo apt install certbot
Check that Cerbot was installed correctly
cerbot --versionCreate the SSL certificate
sudo cerbot certonly --standalone -d node.yourdomain.comIf you encounter an error at this point, it’s likely because port 80 is being used by another application, such as Apache.
Resolving Port 80 Conflicts (Skip unless necessary)
- Install Net Tools : Install tools to diagnose network issues, particularly to check port usage.
sudo apt install net-tools- Check Port 80 Usage: Identify which application is using port 80.
sudo netstat -tuln | grep :80
sudo lsof -i :80- Stop and Disable Apache2: If Apache2 is using port 80, stop and disable it since we’ll use NGINX.
sudo systemctl stop apache2
sudo systemctl disable apache2
With these steps, you should have resolved any conflicts with port 80, paving the way for a successful SSL certificate installation for your Zenon Public Node.
Finally, try creating the SSL certificate again:
sudo cerbot certonly --standalone -d node.yourdomain.com4.3 Installing NGINX
NGINX will serve as the web server for your SSL certificate.
Install NGINX using the following commands.
sudo apt install nginx
sudo systemctl status nginx
Set up NGINX to work with your SSL certificate.
sudo vim /etc/nginx/sites-available/node.confCreate a server block in the file with the following configuration:
server {
    listen 443 ssl;
    server_name node.yourdomain.com;

    ssl_certificate /etc/letsencrypt/live/node.yourdomain.com/fullchain.pem;
    ssl_certificate_key /etc/letsencrypt/live/node.yourdomain.com/privkey.pem;
    ssl_dhparam /etc/letsencrypt/ssl-dhparams.pem;

    location / {
        proxy_pass http://localhost:36098;
        proxy_http_version 1.1;
        proxy_set_header Host $host;
        proxy_set_header Upgrade $http_upgrade;
        proxy_set_header Connection "upgrade";
    }
}
server {
    listen 35998 ssl;
    server_name node.yourdomain.com;

    ssl_certificate /etc/letsencrypt/live/node.yourdomain.com/fullchain.pem;
    ssl_certificate_key /etc/letsencrypt/live/node.yourdomain.com/privkey.pem;
    ssl_dhparam /etc/letsencrypt/ssl-dhparams.pem;

    location / {
        proxy_pass http://localhost:36098;
        proxy_http_version 1.1;
        proxy_set_header Upgrade $http_upgrade;
        proxy_set_header Connection "upgrade";
        proxy_set_header Host $host;
    }
}

server {
    listen 35997 ssl;
    server_name node.yourdomain.com;

    ssl_certificate /etc/letsencrypt/live/node.yourdomain.com/fullchain.pem;
    ssl_certificate_key /etc/letsencrypt/live/node.yourdomain.com/privkey.pem;
    ssl_dhparam /etc/letsencrypt/ssl-dhparams.pem;

    location / {
        proxy_pass http://localhost:36097;
        proxy_http_version 1.1;
        proxy_set_header Host $host;
    }
}
Make sure to replace all appearances of node.yourdomain.com with your custom domain.
Enable the configuration by creating a symbolic link.
sudo ln -s /etc/nginx/sites-available/node.conf /etc/nginx/sites-enabled/Test NGINX Configuration
Before restarting NGINX, test the configuration for any syntax errors.
sudo nginx -t
sudo systemctl restart nginx
Configure Firewall Rules
Allow HTTP and HTTPS traffic through your server’s firewall.
sudo ufw allow 80/tcp
sudo ufw allow 443/tcp
sudo ufw reload
Enable NGINX to Start on Boot
Ensure NGINX is enabled to start automatically.
sudo systemctl enable nginxYour Zenon Public Node is now configured with a secure SSL certificate and connected to your domain, enhancing its security and credibility.
Step 5: Start the Syncing Process
The last step in the process is to use the ZNN Controller to start the service and kick-off the syncing process.
Run ./znn-controller and select option 3) Start service.
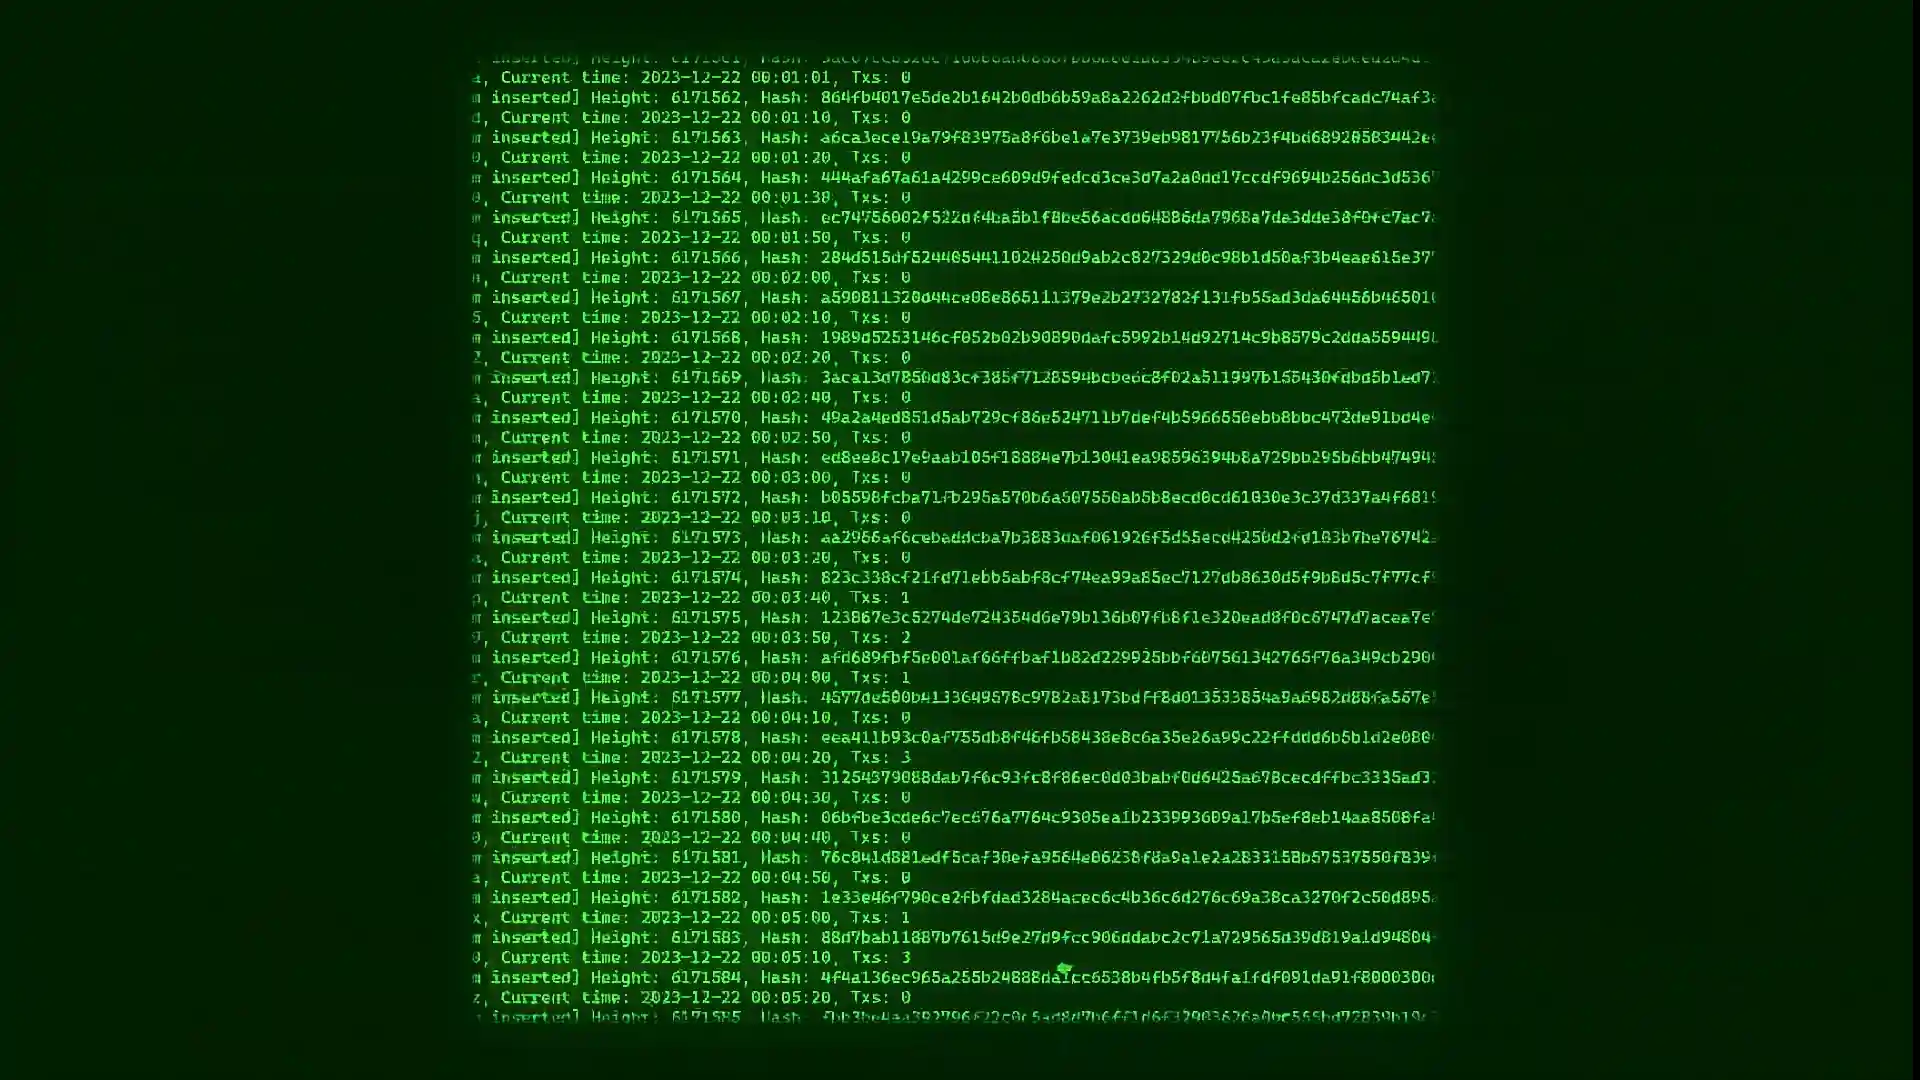
sudo ./znn-controllerTo monitor the syncing process, we can stream the syslog file
sudo tail -f /var/log/syslog… and there you have it! This is what succesfully running znnd looks like:
Performance Optimizations
If you’re encountering performance issues, it may help to increase the maximum number of open files or the available amount of swap memory. This step is optional but can optimize performance.
Final Thoughts
As we conclude this guide, the potential and future of the Zenon Network fill me with excitement. To anyone new to crypto, this guide might feel overwhelming, but with the help of ChatGPT, it becomes easy and fun.
In the meantime, why not put ATS’s public node to the test?
Inside the s y r i u s wallet:
wss://node.atsocy.com:35998
Inside an explorer:
https://node.atsocy.com:35997
Use it, stress test it, and help us improve the infrastructure. Your participation and feedback are invaluable. By pushing our systems to their limits, you’re not just helping us; you’re shaping the robustness of the Zenon ecosystem.
And here’s a little teaser: I’m all set to write a follow-up article as the network demand increases. This one will delve into setting up multiple znnd instances behind a load balancer – a step forward in ensuring even more robust and efficient network performance.
Coming up next:
- Replacing NGINX with Caddy
- Script for easy automatic setup
- Making servers load-balanced
Comments
Loading comments…